Includes Unlimited Access, Private Facebook Group, 11 Video Lessons,
Digital Book Download, and more!
PLEASE JOIN ME FOR A MONTH OF GEL PRINTING THIS SUMMER!
Amazing Gel Prints: 11 Lessons Plus One Live ZOOM Call
Workshop Dates: July 31st to August 25th
Fee: $165
Workshop Description
Please join me for a month of gel printing this summer!
These 11 lessons were originally published in my book Amazing Gel Prints; Working With Stencils which you will receive as a digital download in order to follow along with the course. We’ll start with the basics to get you thinking about color combinations and layering, then move to playing with basic stenciling techniques, working up to more complex applications, and creating richly layered prints by Lesson 11.
On Friday, August 25th we will gather together via Zoom and make prints with a creative community from all over the world. This will be a time to bring all of your questions, too. (Don’t worry if you need to miss the live component; it will be recorded.)
Access to Paper Paintings private Facebook group will be available for you to (optionally) share your work in order to learn from and enjoy the artwork of your fellow students.
Class Includes Lifetime Access, Online Community, 11 Video Lessons, Digital Book Download, and More!
…………………………………………………………………………………………………………………………………………
Lesson Plan:
– All lessons are pre-recorded and will be available on the following schedule:
Lesson 1 – Monday, July 31
Lesson 2 – Wednesday, August 2
Lesson 3 – Friday, August 4
Lesson 4 – Monday, August 7
Lesson 5 – Wednesday, August 9
Lesson 6 – Friday, August 11
Lesson 7 – Monday, August 14
Lesson 8 – Wednesday, August 16
Lesson 9 – Friday, August 18
Lesson 10 – Monday, August 21
Lesson 11 – Wednesday, August 23
LIVE ZOOM CALL – Friday, August 25th, 3:00pm – 5:00pm Pacific Time
This will be recorded in case you have to miss it
Lesson 1 – Paints and Papers
In this first class we will cover what you need to know about pigment, paints, paper, layering and combining colors. I’ll also show you how I clean and store my supplies and organize my gel prints.
Lesson 2 – Light Colored Solids and the Basics of Stencils and Masks
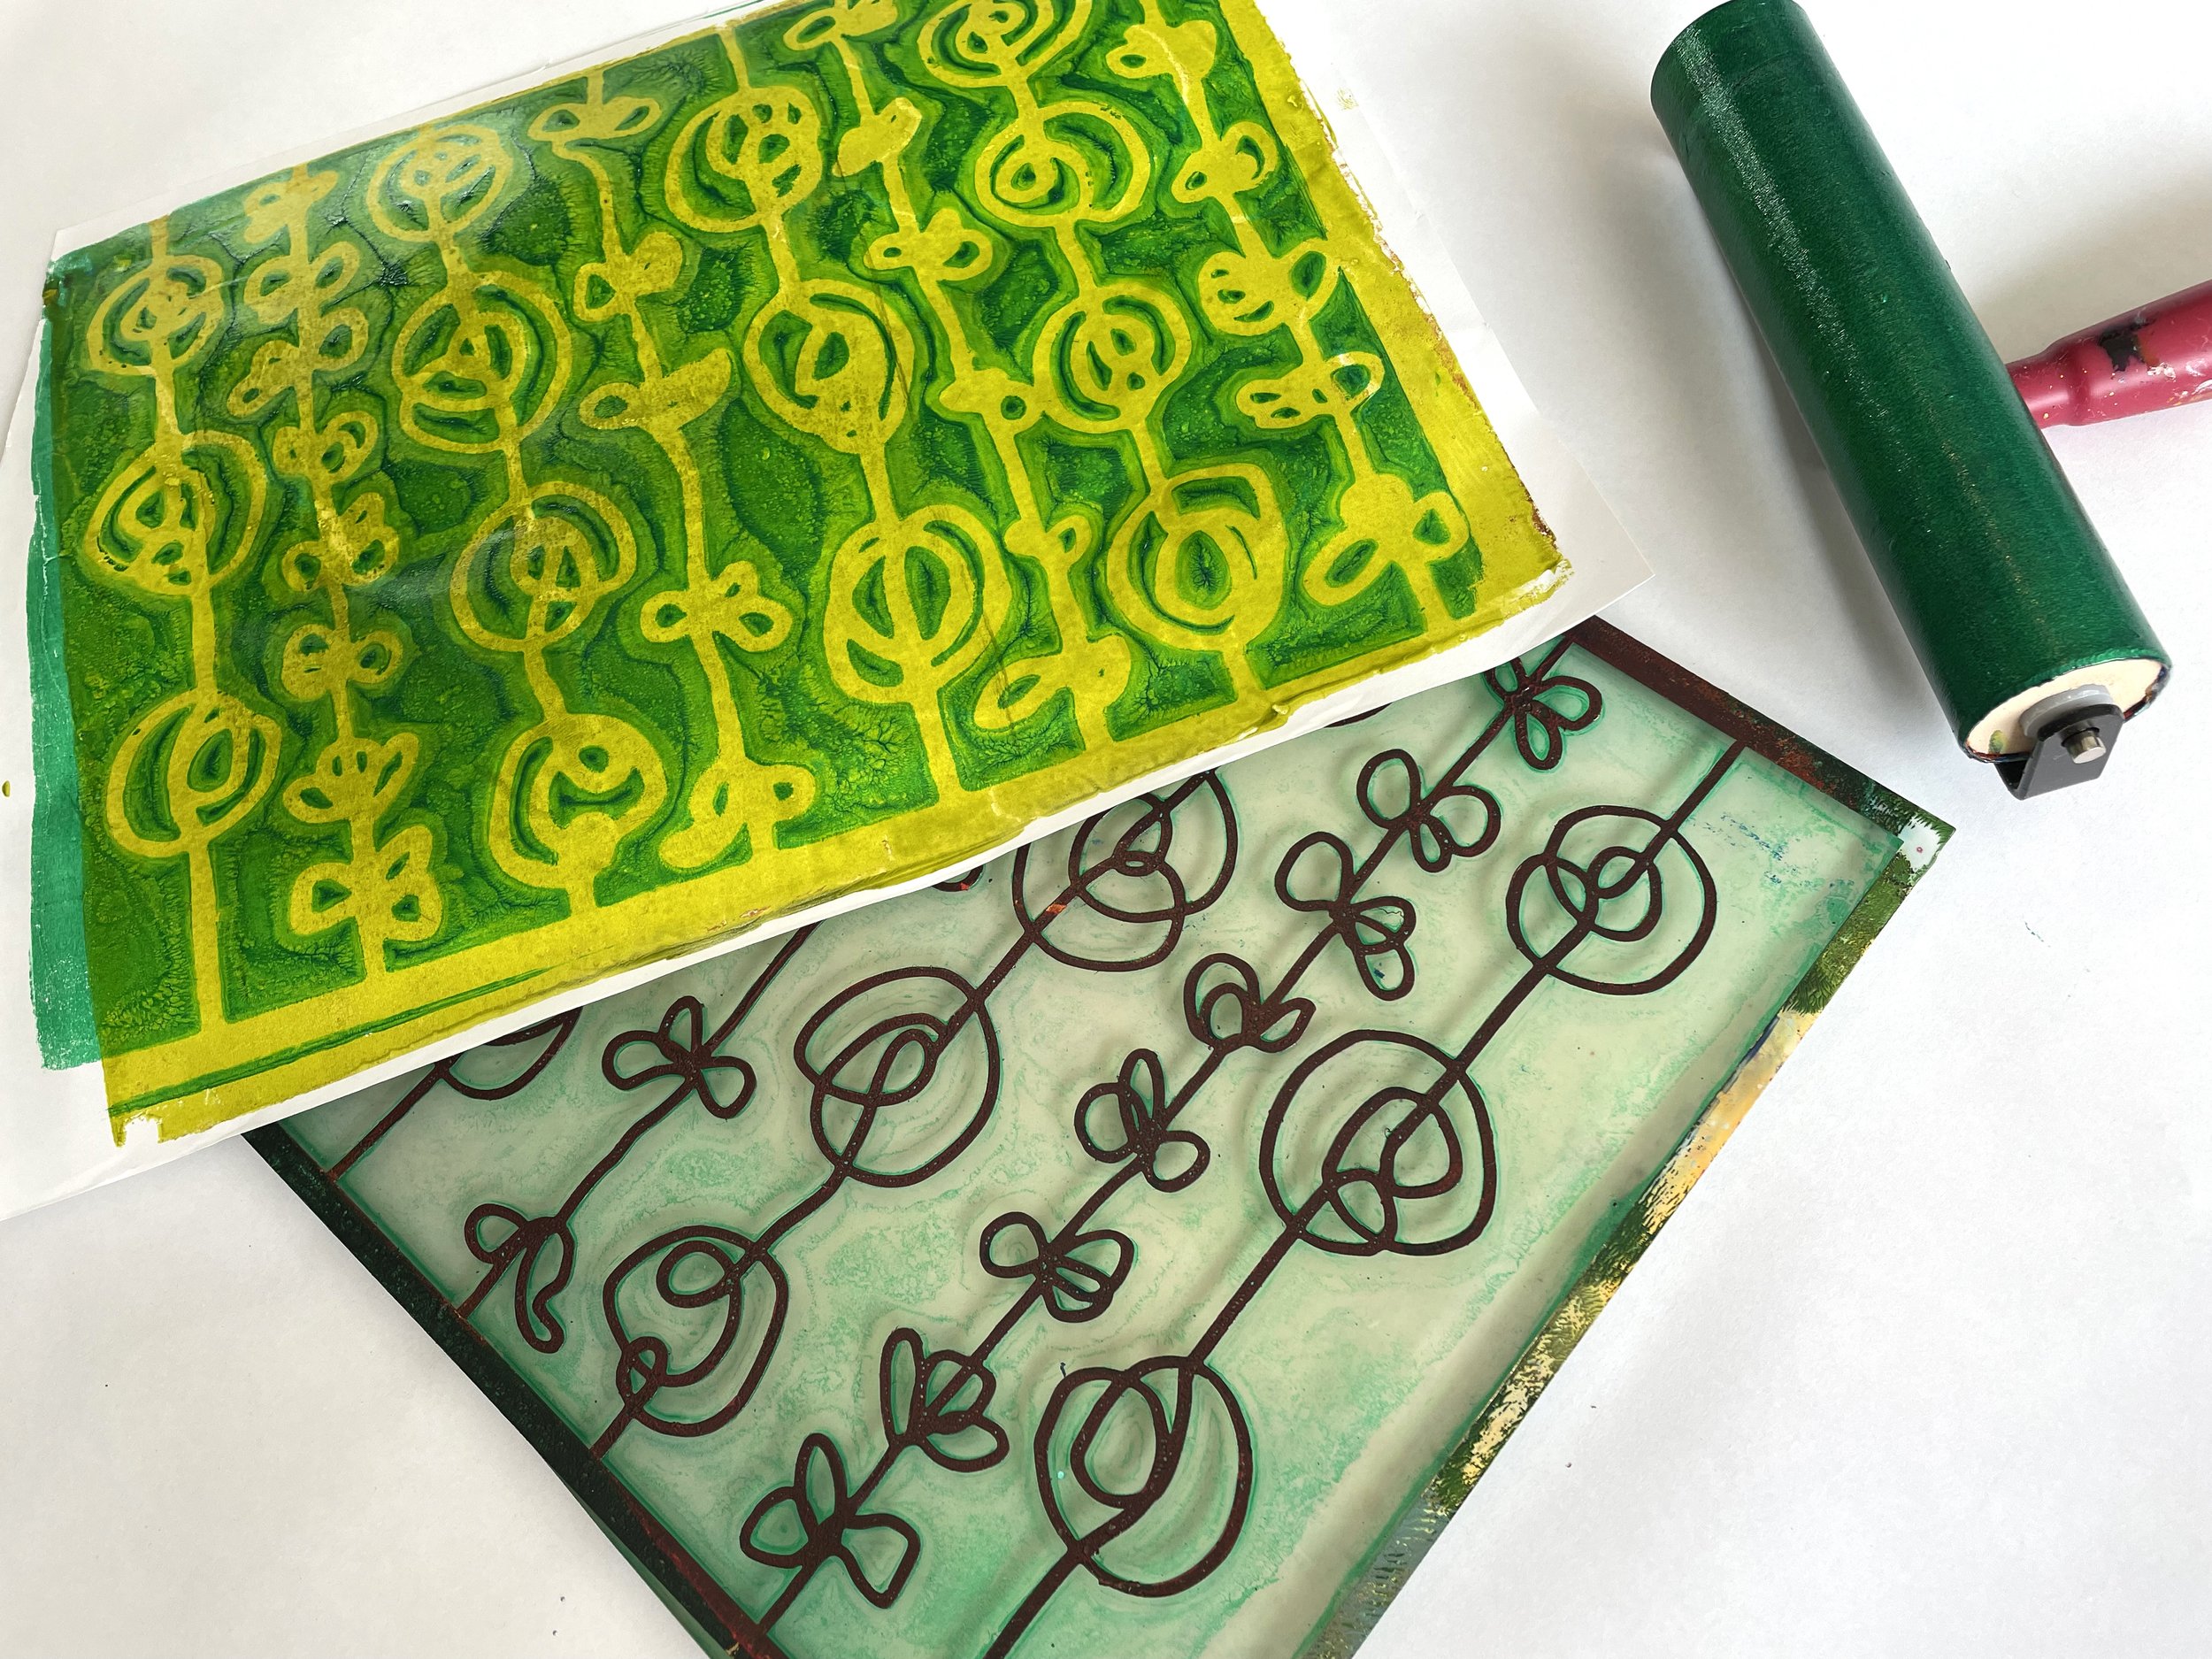
In order to eliminate the whites, I always start with a solid base layer. I do not clean my plate between layers, this makes use of any residual paint on the plate from one layer to the next. I call the leftover dried paint the crust. Your subsequent layers pick up the crust along with the newly applied paint–this creates often unexpected and beautiful results. Next we will talk about the difference between stencils and masks and practice basic layering and color combinations.
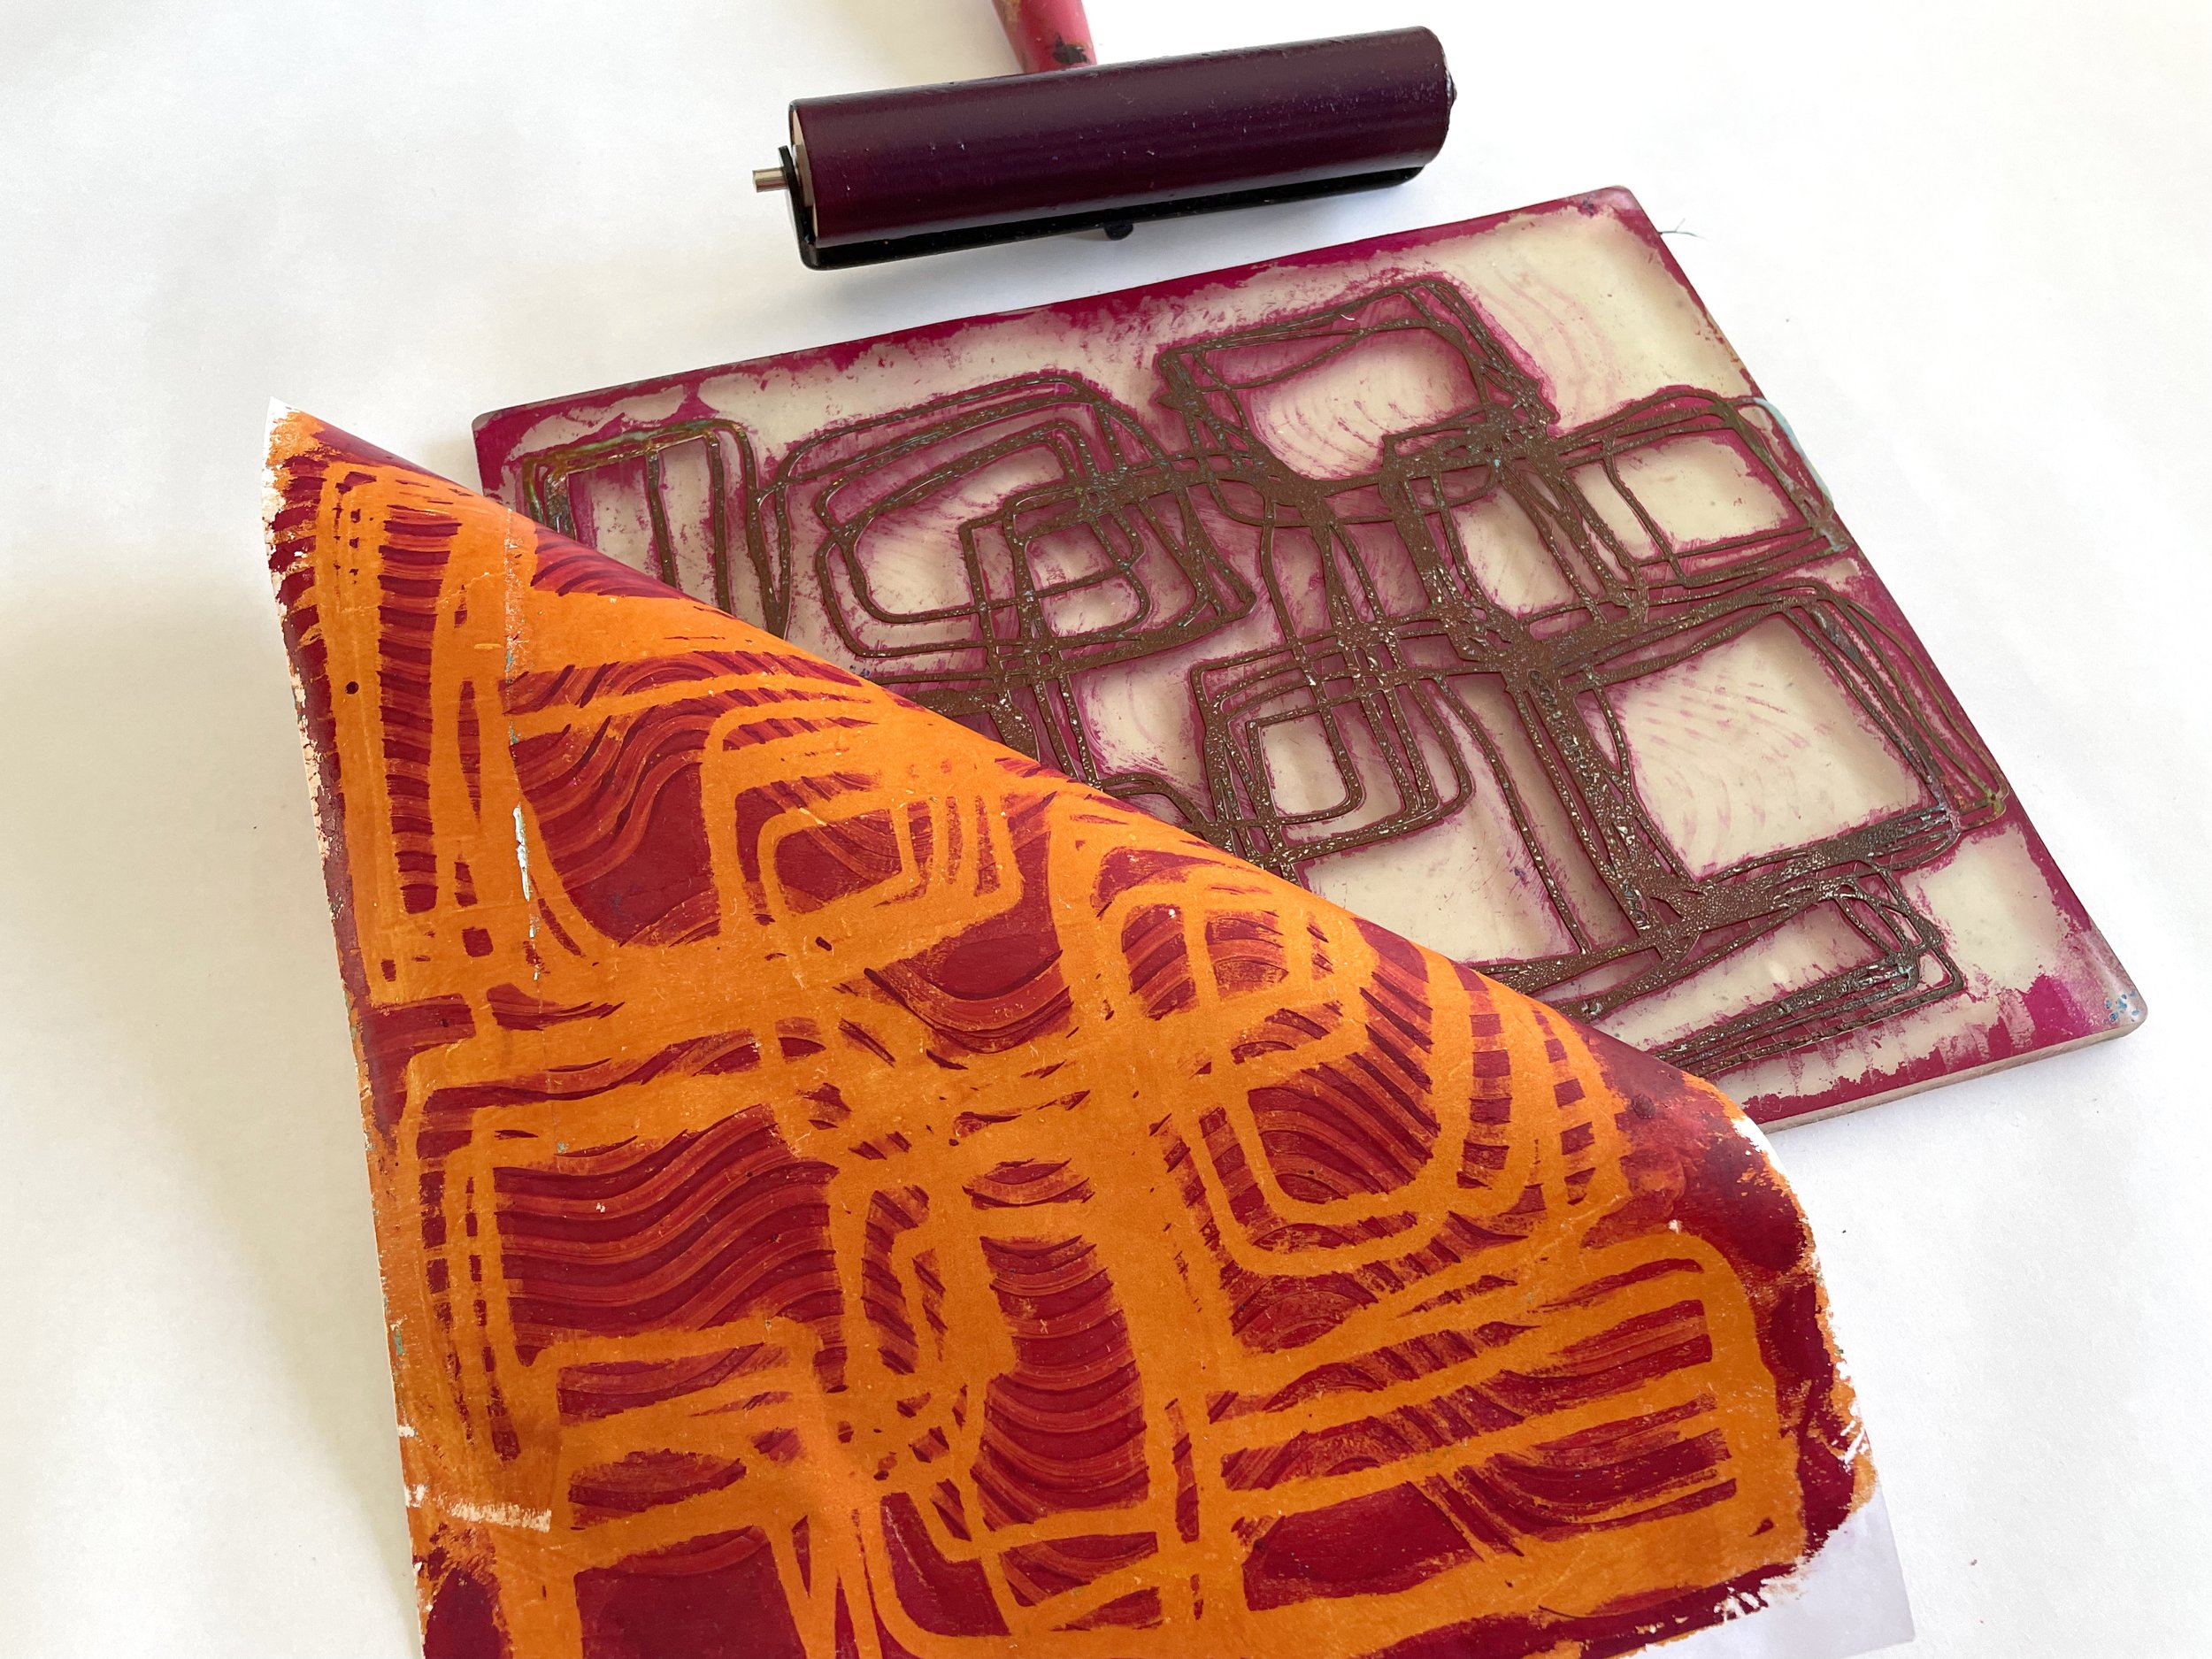
Lesson 3 – Learning to Layer
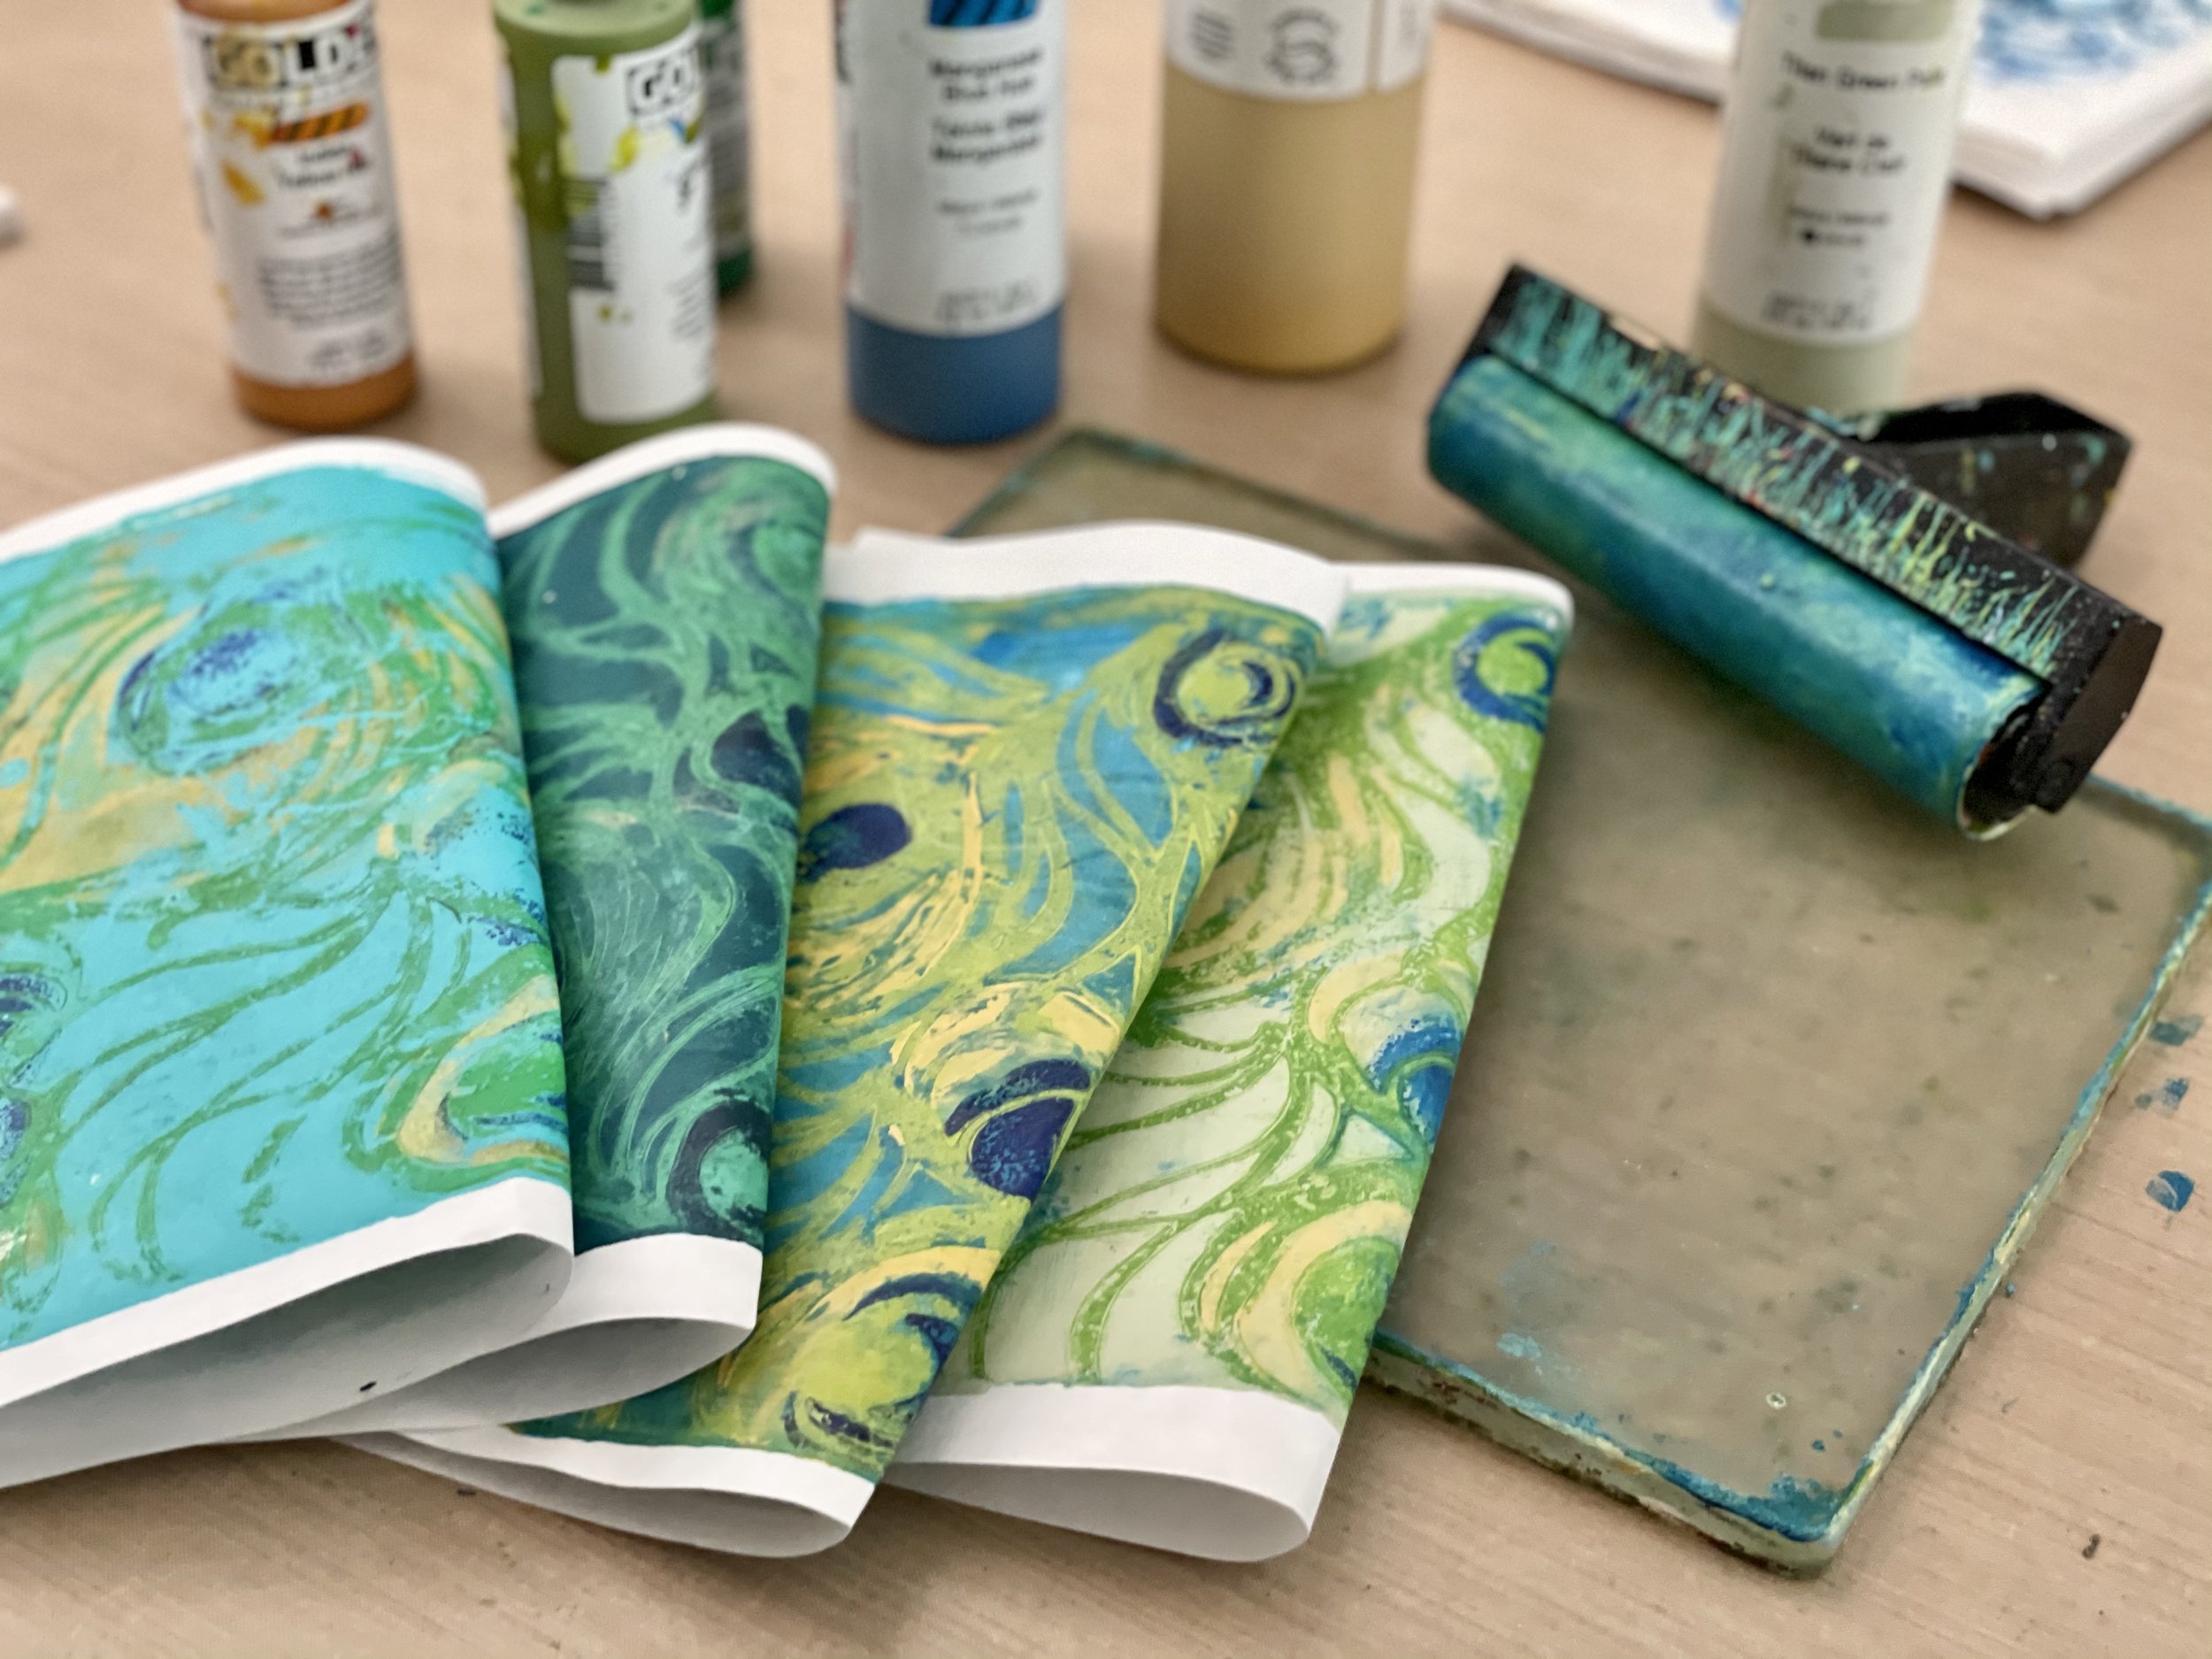
Once you have created several light colored base layers your next step is to multiply prints over and over each other in various different ways. Because fluid acrylics are varying degrees of translucency, each layer will show through and multiply with the previous print unless that pigment is opaque. We will talk about opaque colors and how they should be incorporated as base layers or used sparingly in subsequent layers.
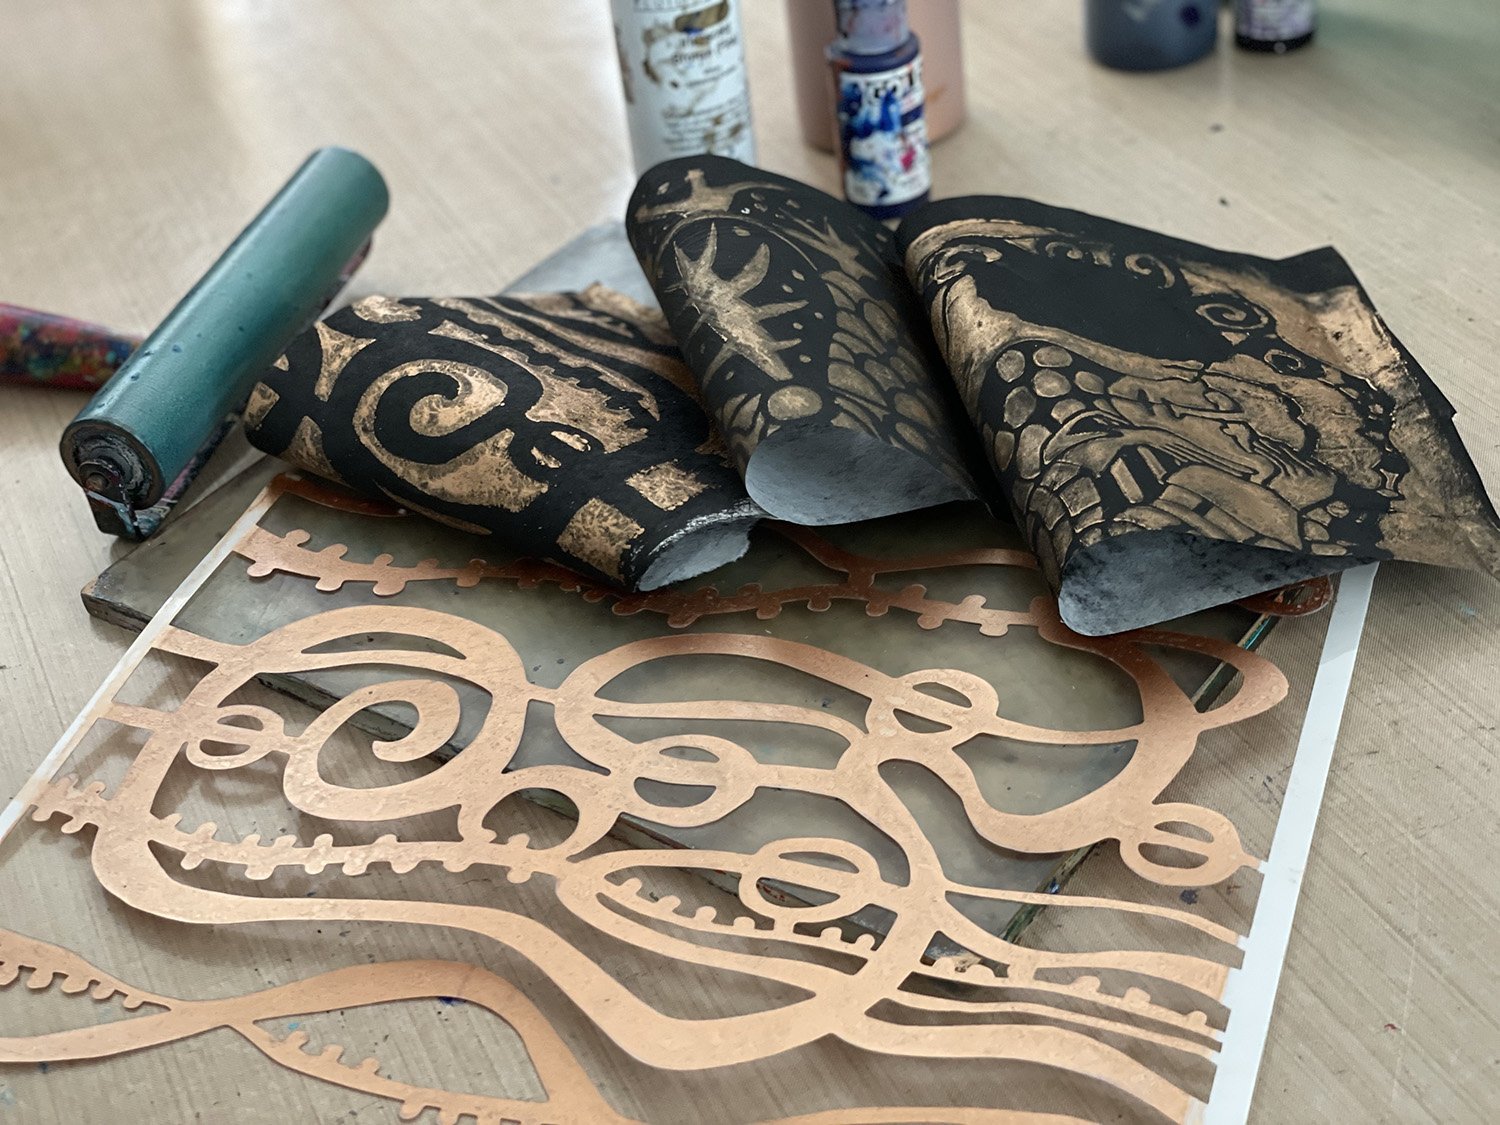
Lesson 4 – Iridescent and Interference Colors
Mixing metallic paint with other colors makes for some wonderful NEW metallic hues that you may have never considered. Printing with Iridescent and Interference over deep, dark colors makes for some very dramatic color combinations
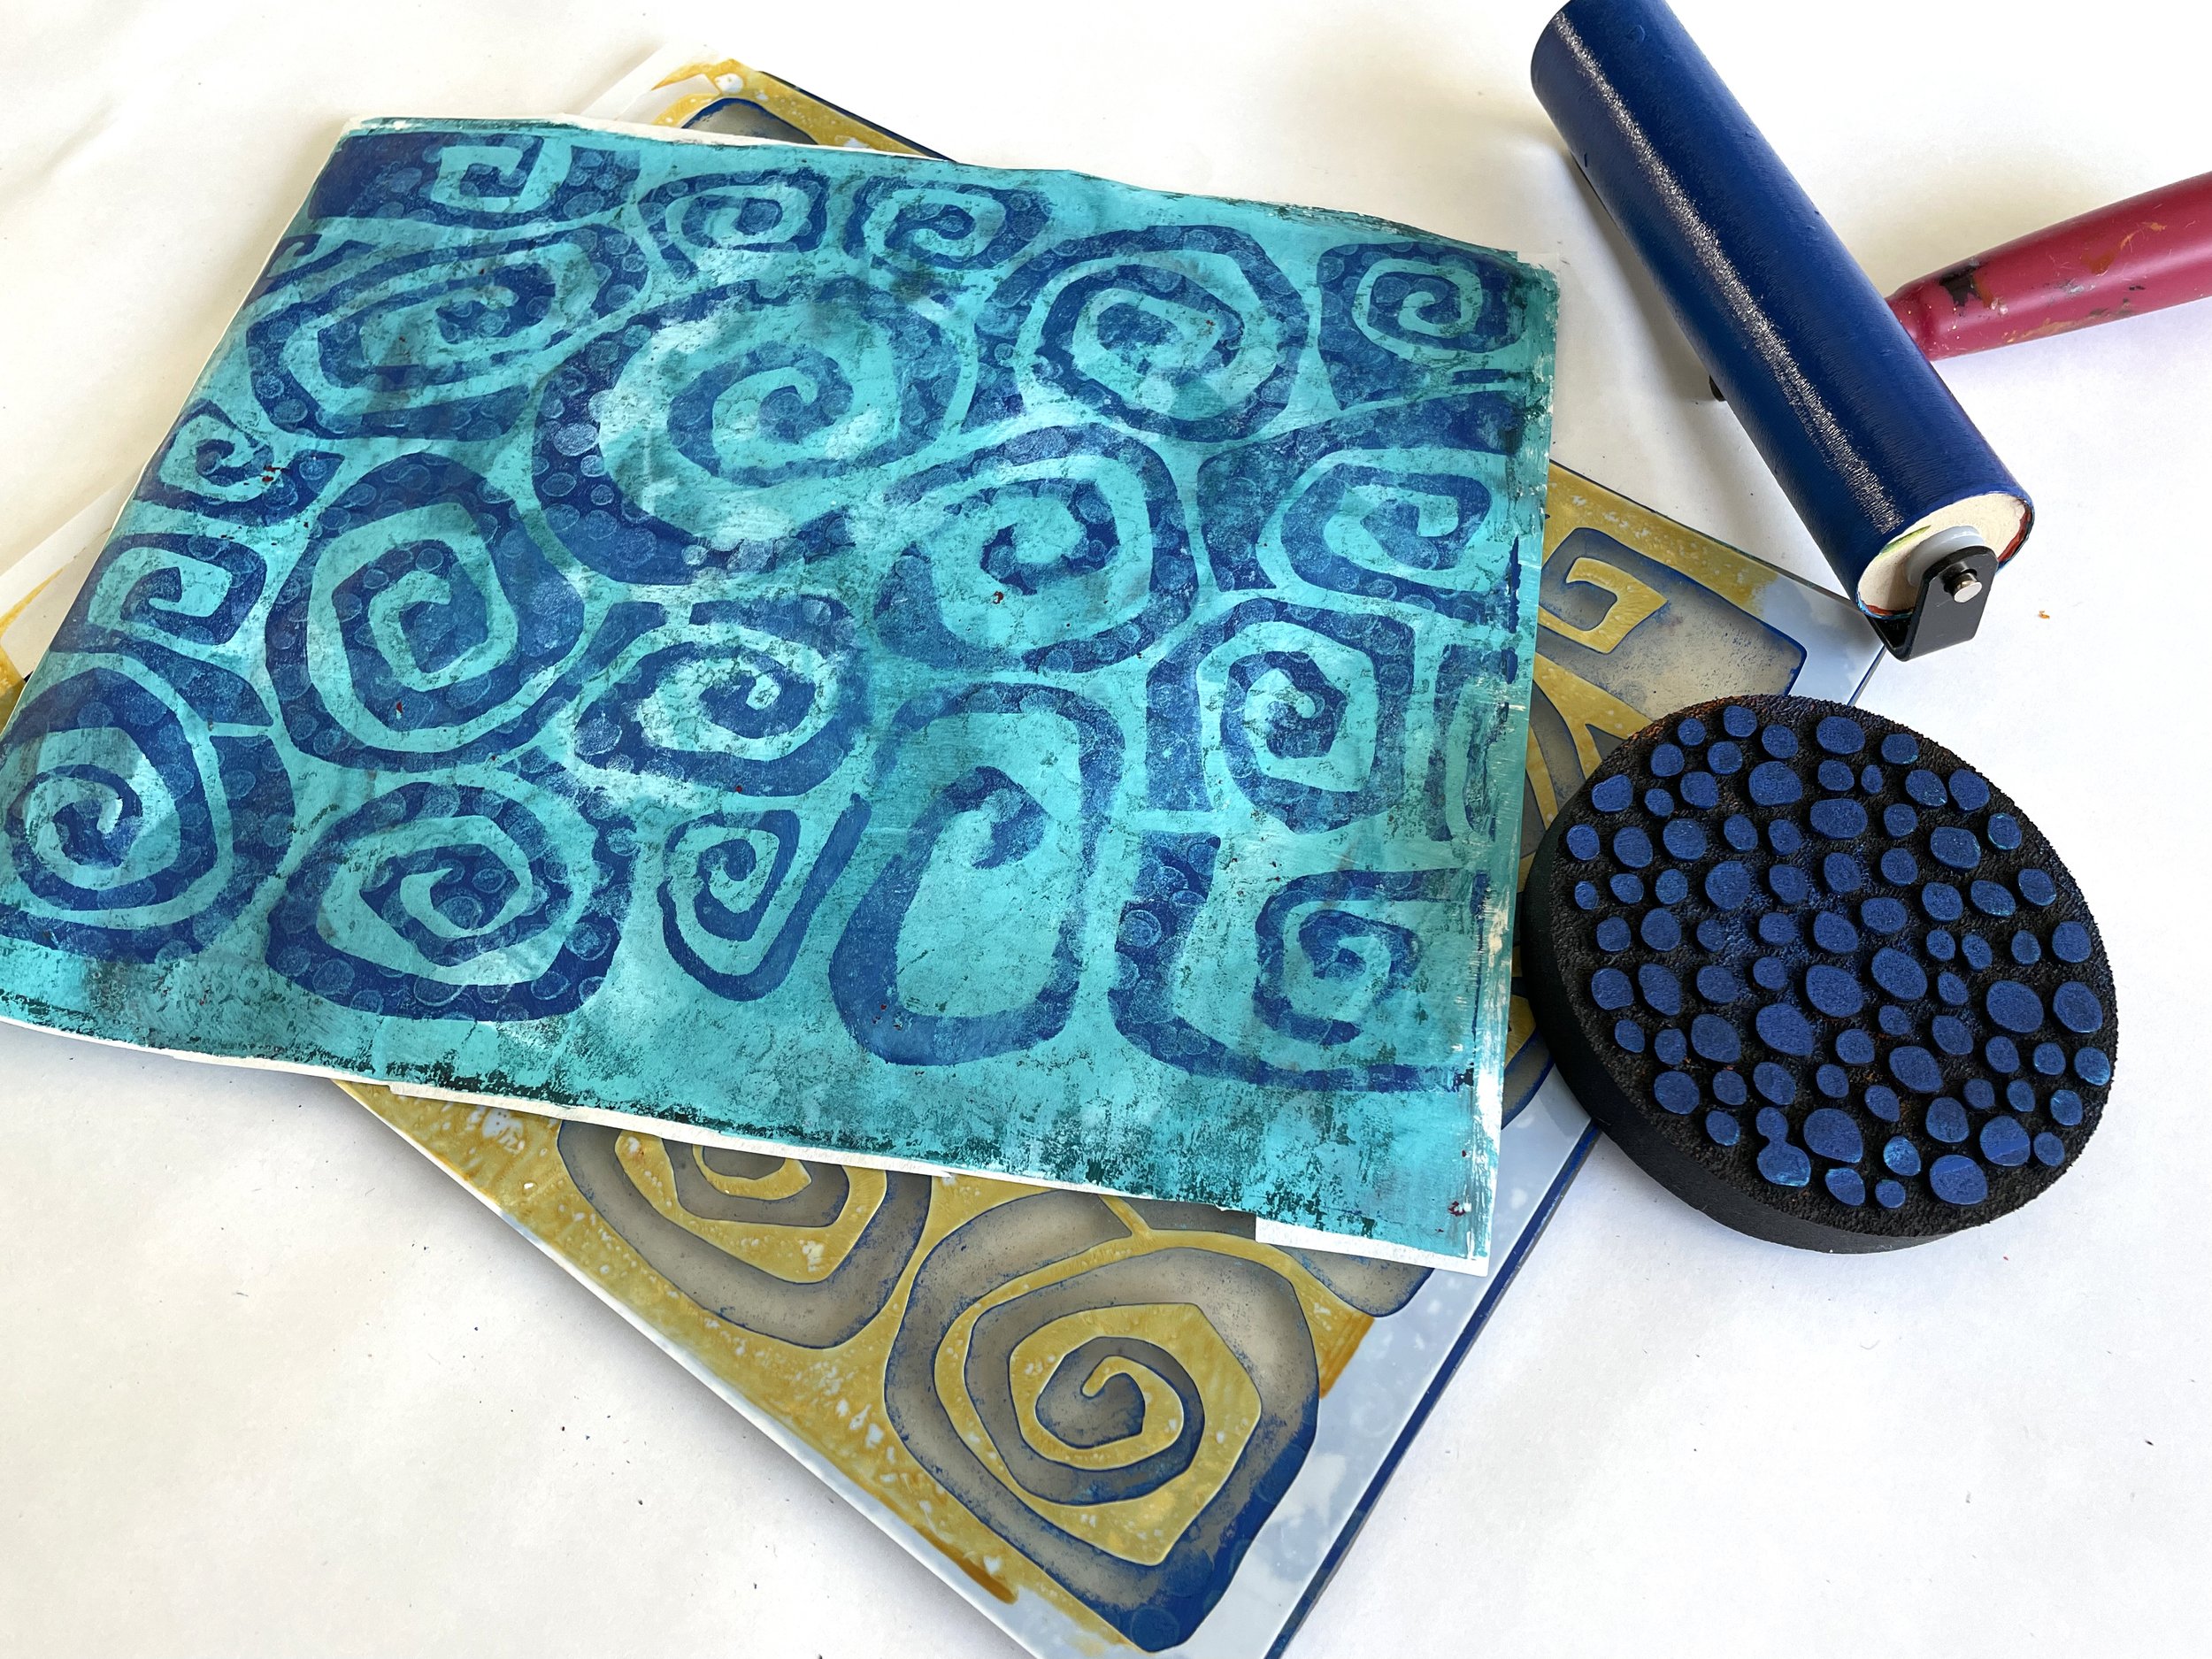
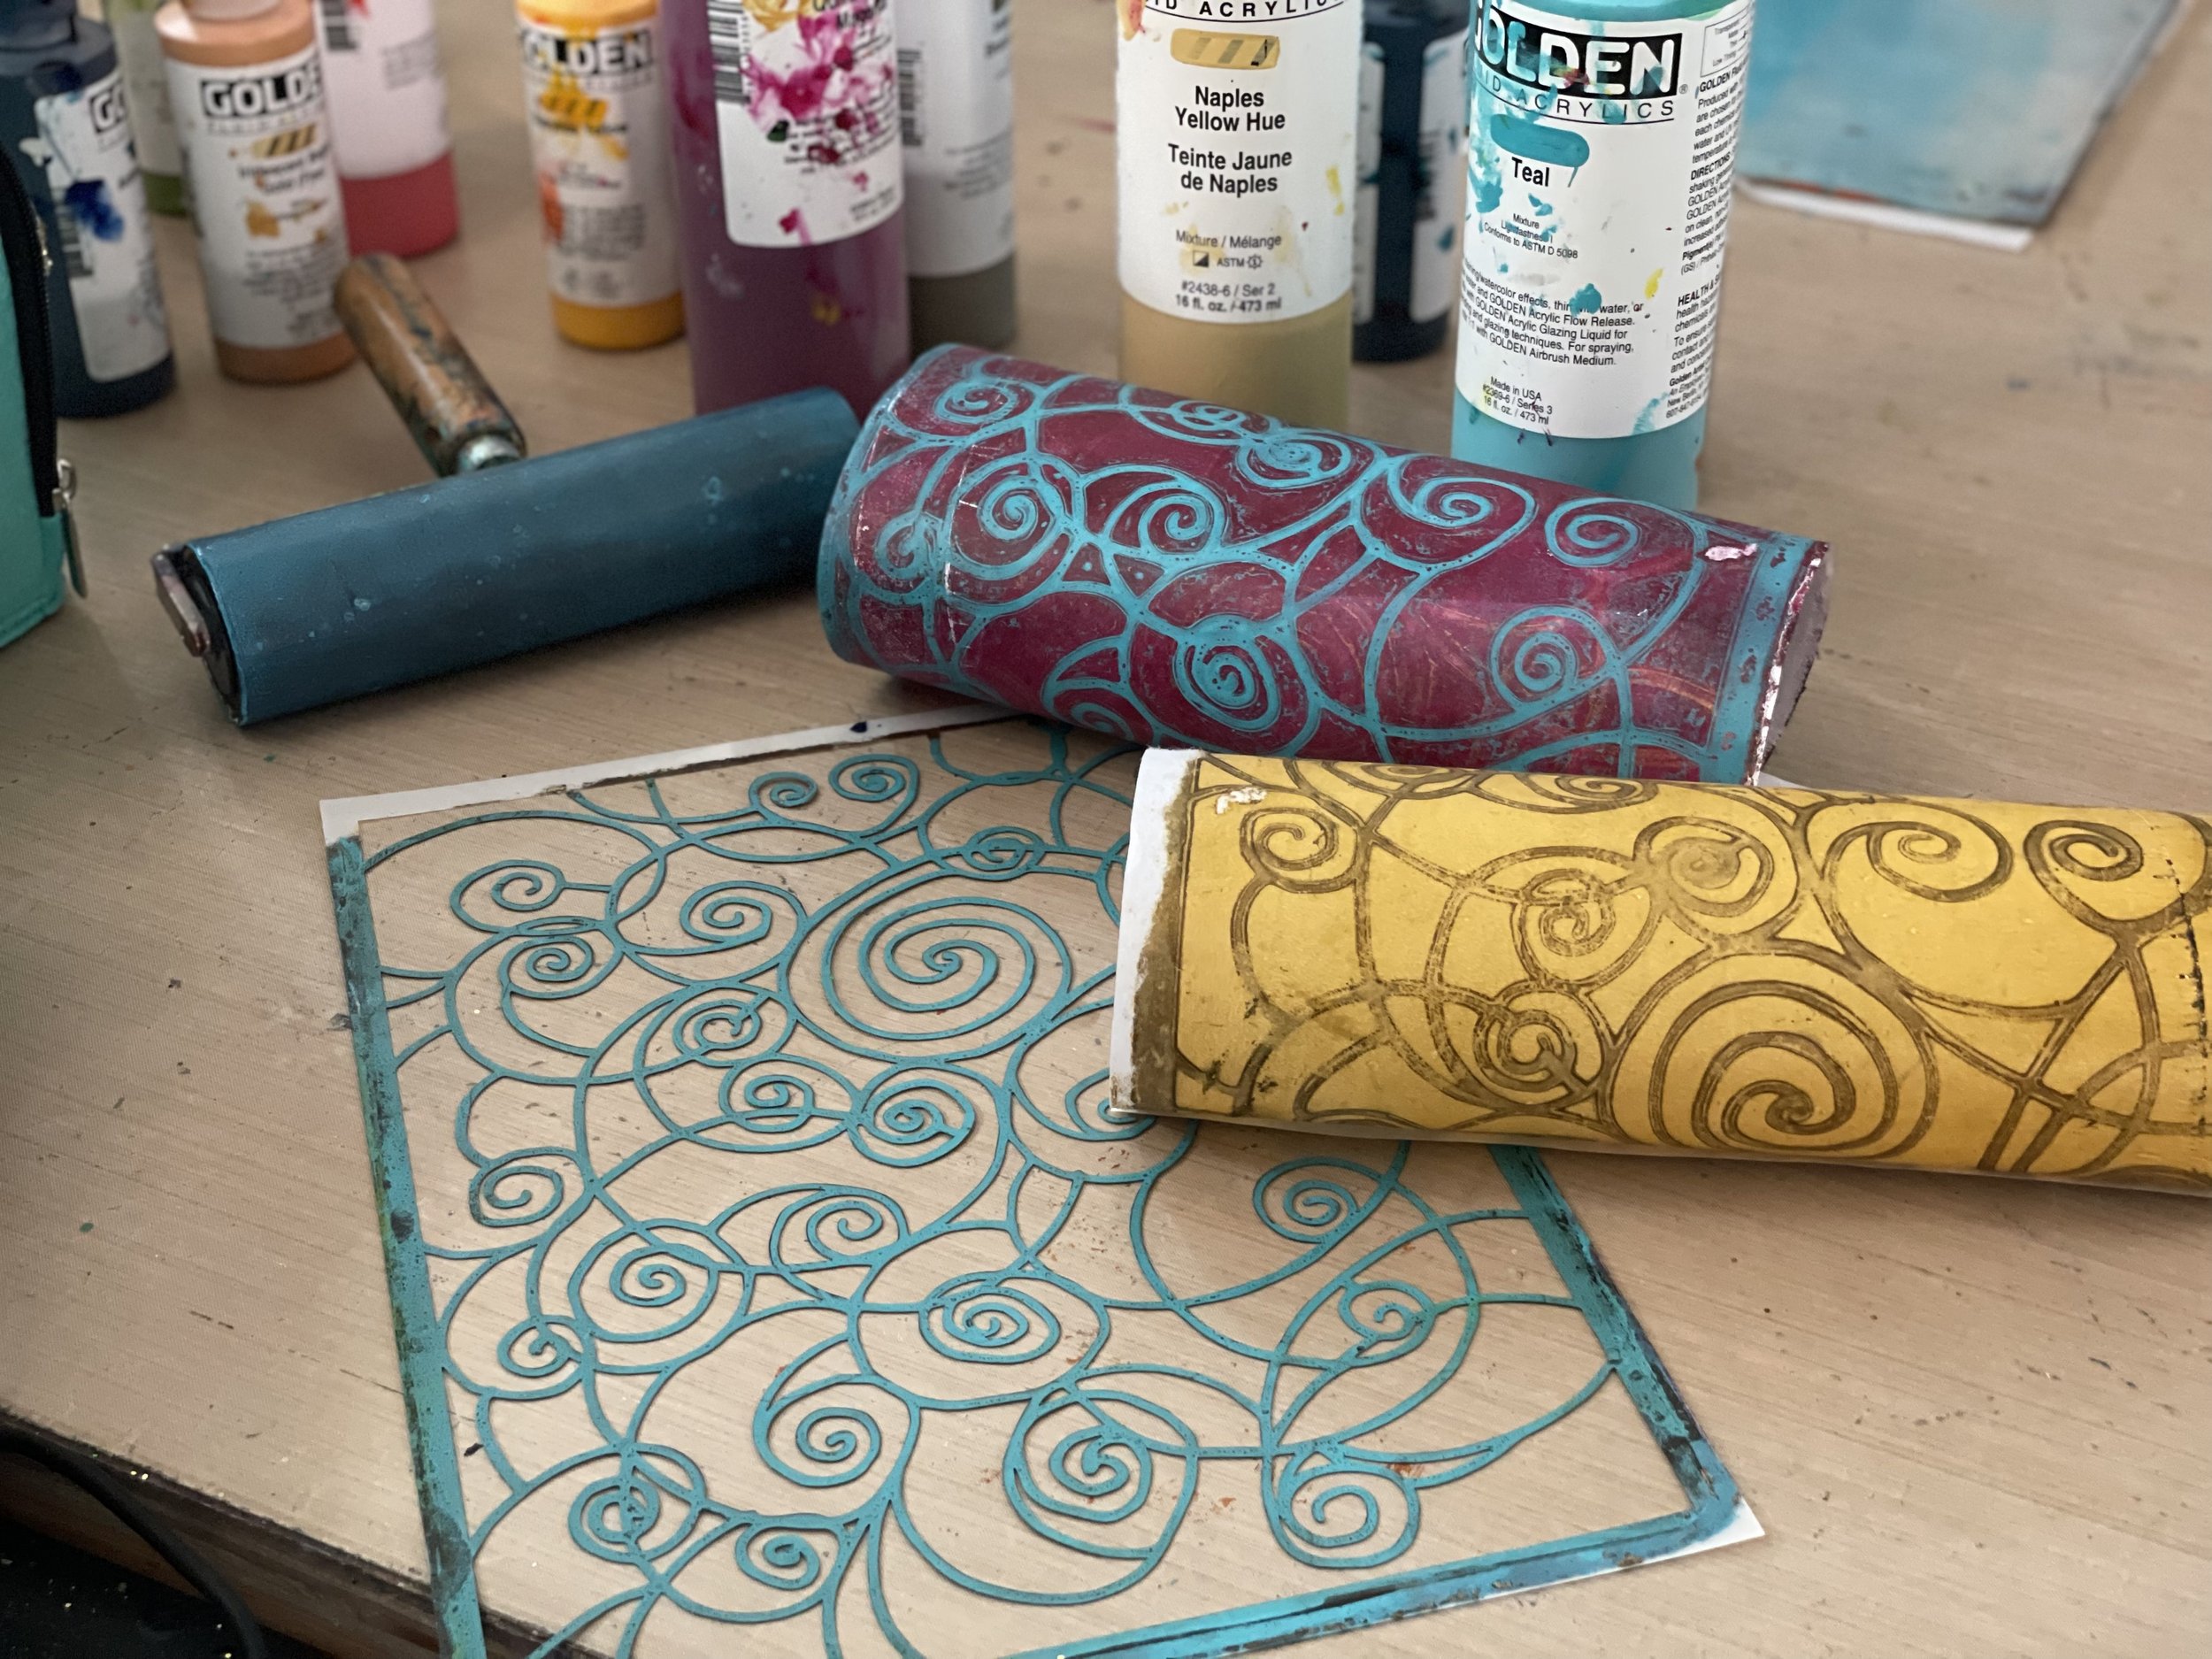
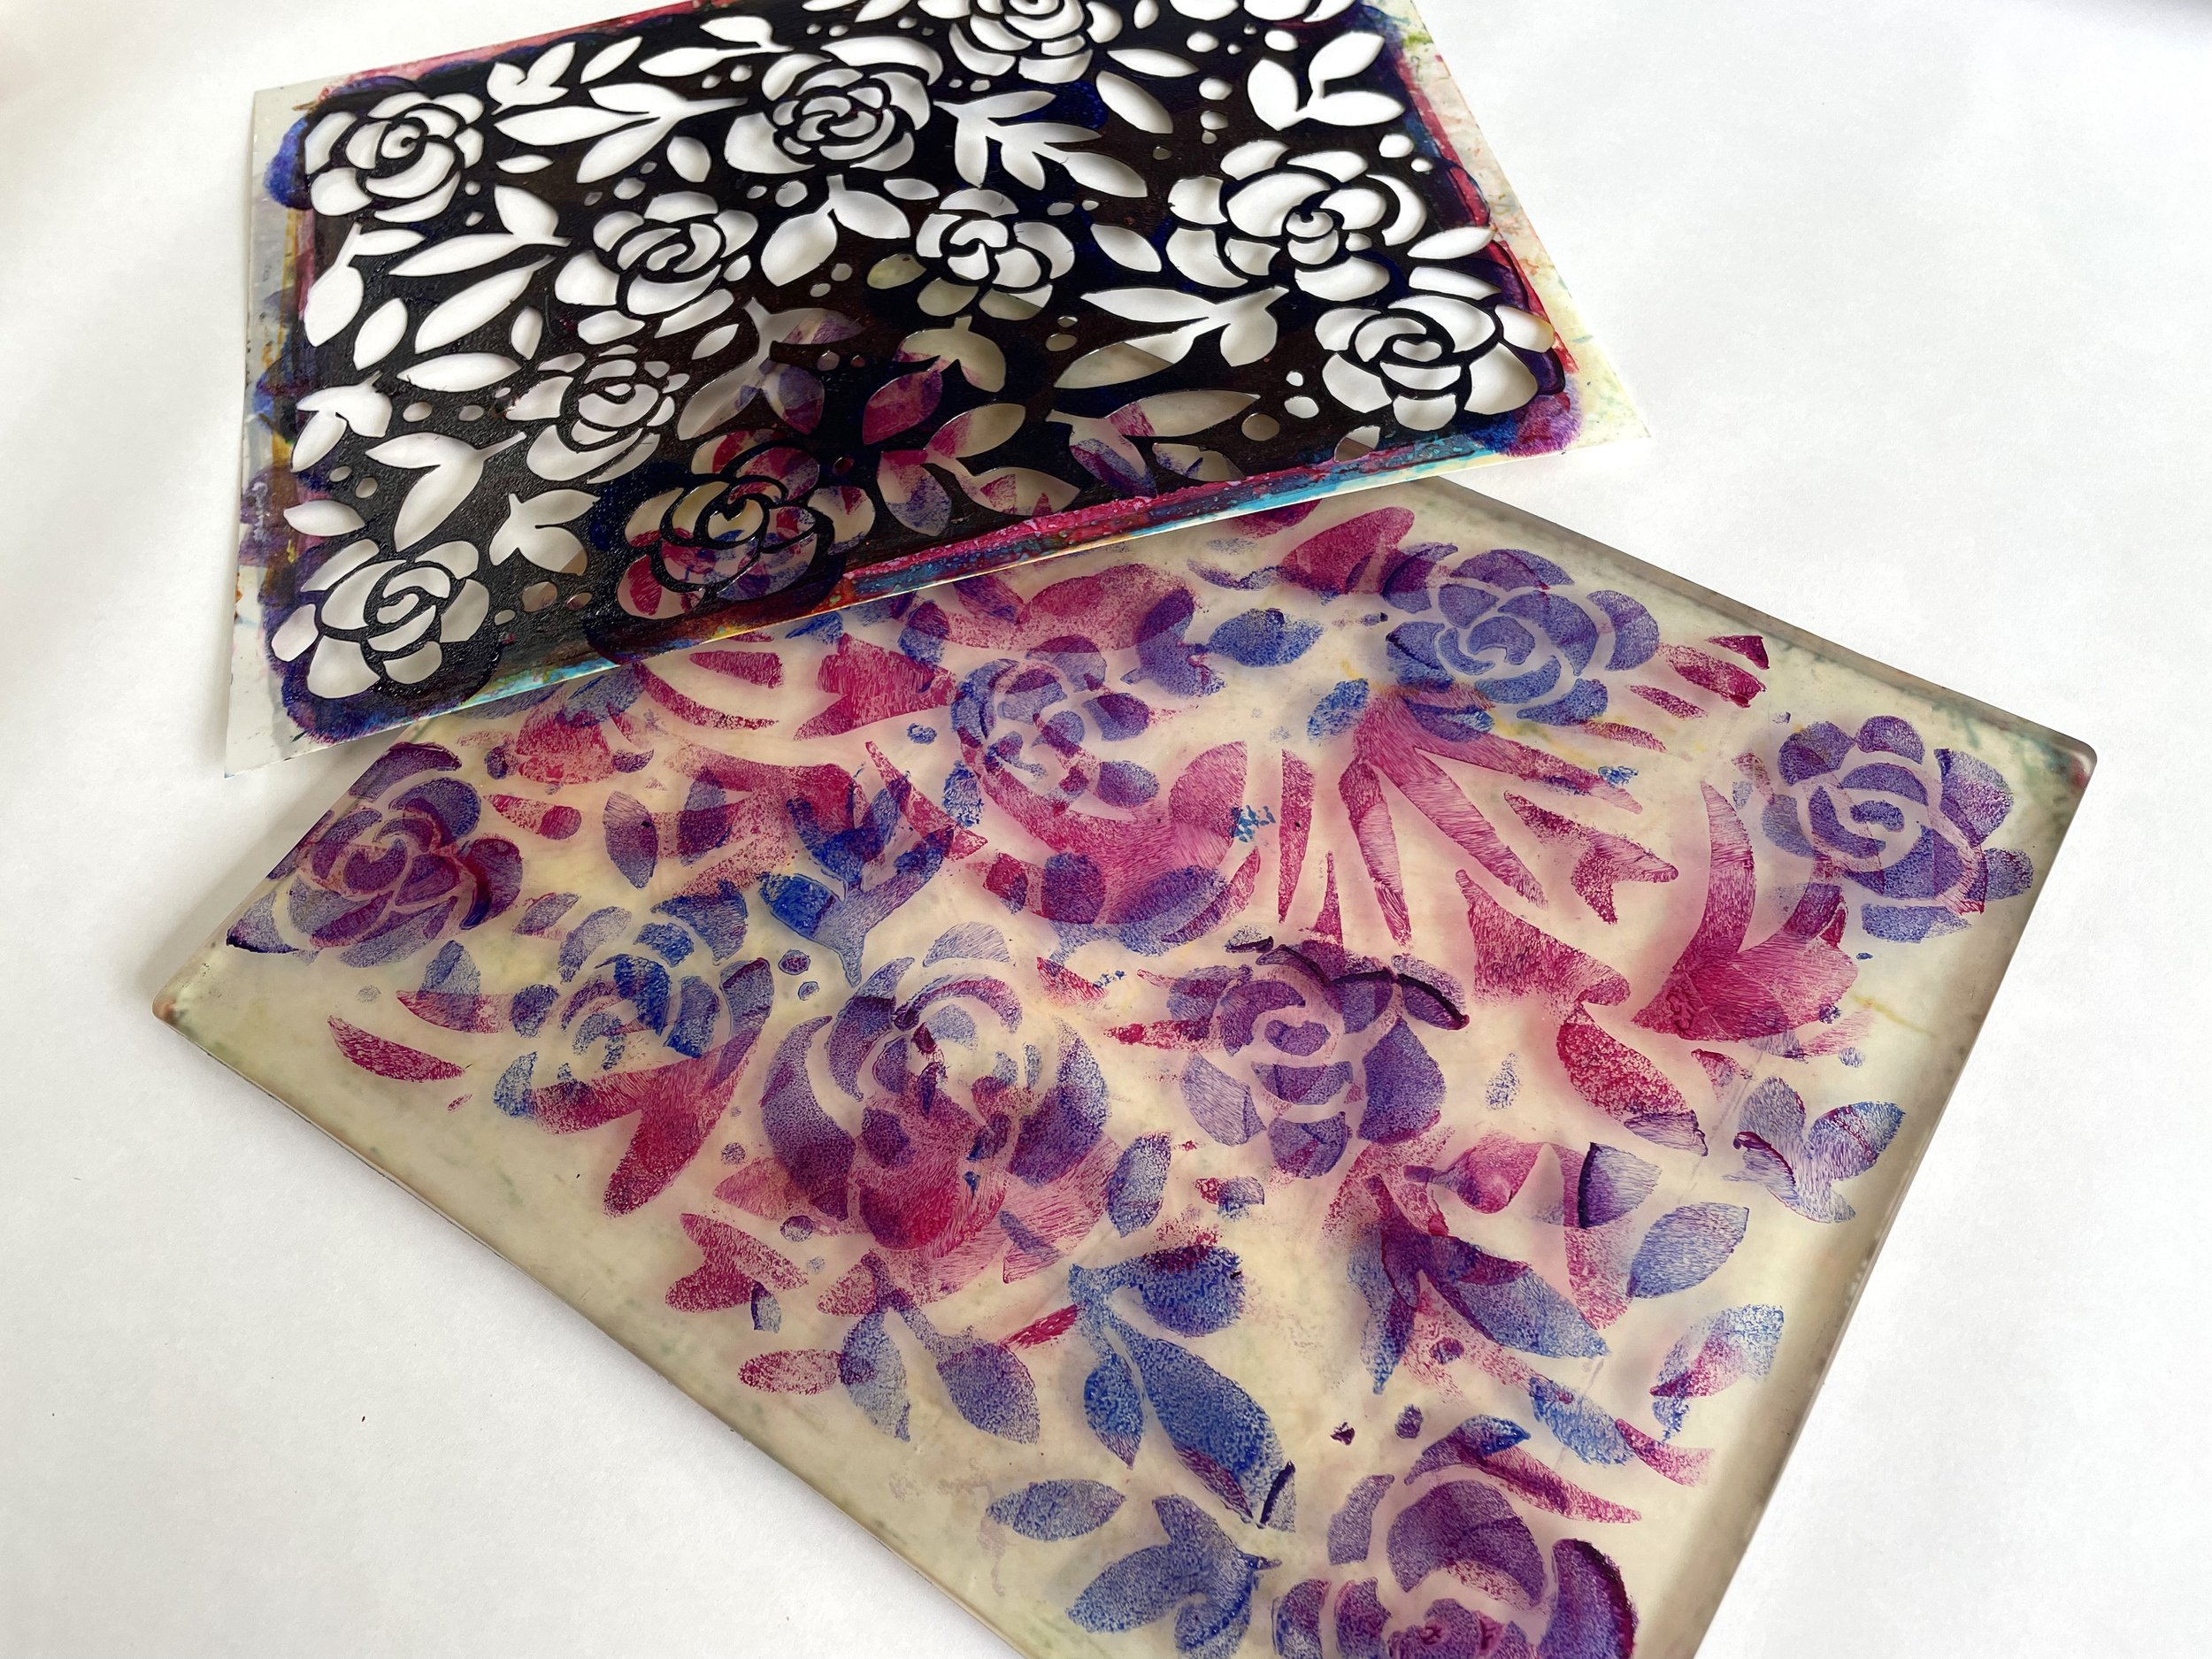
Lesson 5 – Combining Stencil Patterns
My stencil and mask designs often include combinations for layering organic with geometric, but there are many ways to combine patterns for results. Let’s look at some layering combos utilizing multiple stencils and masks.
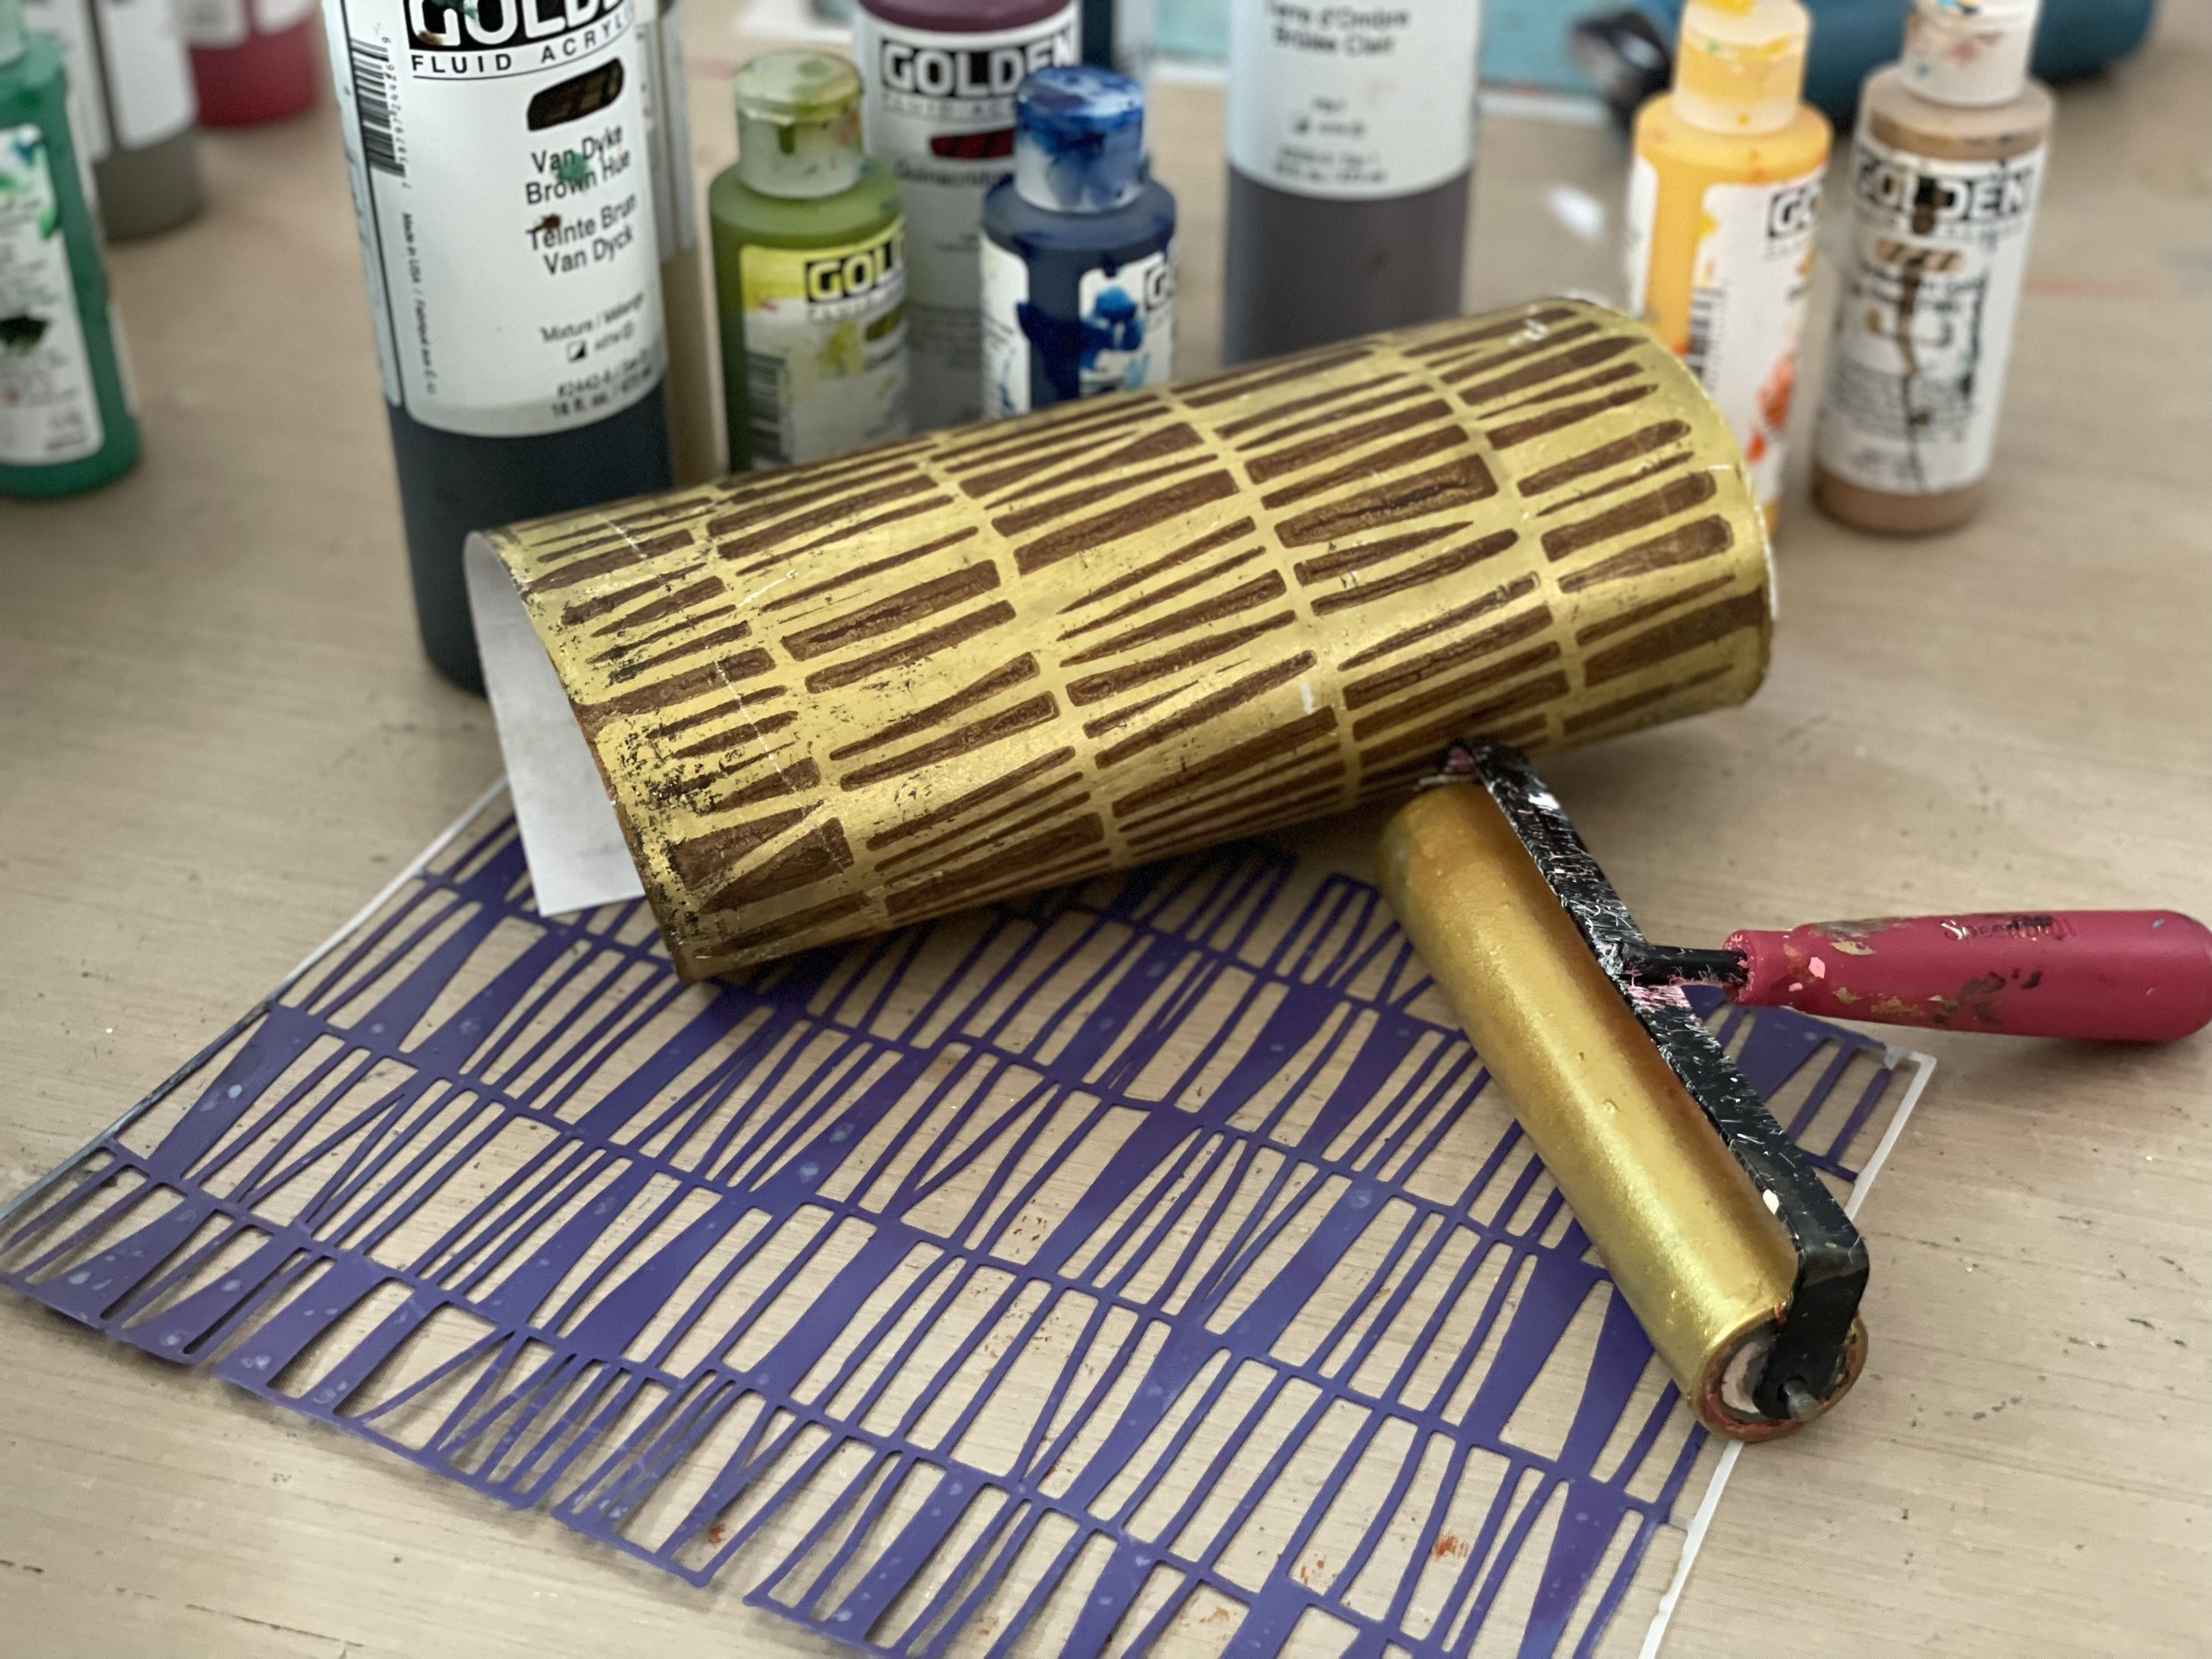
Lesson 6 – Adding Texture
Another way to add pattern and texture to your layers is with tools such as texture plates, foam stamps, and scraping tools. Let's explore adding pattern into the paint before we apply the stencil or mask.
Lesson 7 – Ghost Printing
A ghost print is an impression you get from the paint that has been trapped beneath your stencil or mask after you pull your initial print. Ghost prints can be utilized in several different ways; you can transfer your ghost print to a prepared light colored solid, you can multiply it over the first print, or you can let it dry on the plate and pull it with additional paint onto a new sheet of paper–the combinations are endless.
Lesson 8 – One Pull Prints
Layers are key in gel printing but they do not always have to be created separately. One pull prints allow time for you to curate your colors, textures, and patterns on the plate before you pull your final print with a layer of paint over the top. I’ll show you how to add a little bit of stamping, a little bit of stencil, a little bit of mark making, and a final layer of color to pull it all off together!
Lesson 9 – Adding Watery Washes and Splatter
Take your Fluid Acrylics, add water, and use a soft bristled brush and add a wash of color to the back of your prints. This technique produces an effect that is uniquely different from working on top of a solid base layer because it reveals colored torn edges! We will also explore splatter, working wet into wet and wet into dry.
Lesson 10 – The Sparkly Stuff
While working with glitter can be messy, it’s still a favorite–who doesn’t love a little bling? I also like to add some stamping on top of my gel prints with a metallic paint, I’ve got tips for you for both.
Lesson 11 – Mark Making
Adding lines and marks, dashes and dots, X’s and O’s in your own hand adds a personal touch to your gel prints. Try scribbling with materials such as paint markers, micron pens, wax crayons, etc. Random hand-drawn patterns can be difficult to keep loose–experiment by incorporating your non dominant hand in order to be more spontaneous with your line.
Lesson 12 – ZOOM Call LIVE
Watch me demo some of your favorite techniques, plus Q&A
About the Instructor:
Elizabeth St Hilaire is a painter, collage artist, and creativity workshop instructor known for her fun classroom environment and innovative collage techniques, both designed to help adult students reconnect with a playful approach to creativity. She has authored five instructional books for artists and her collage artwork is in collections around the world.
…………………………………………………………………………………………………………………………………………
Supplies:
Found Paper such as dictionary pages, sheet music, old letters, ledgers, books, deli paper, maps, etc.
Rice Paper my favorite 9x12 pad (I use this the most)
Rice Paper on a Roll 8" x 20' this is the very same paper that's in the pad
Joggles A-4 Printable Rice Paper with fiber, this tears with wonderfully soft edges
9x11 Gel Plate and optional gel plate storage tin
Min Ink Blending Tool plus Domed Refills to push paint through small areas of the stencil
Stickles Glitter Gel for adding glitter with NO MESS to your finished prints
Speedball Deluxe Brayers: 6-inch and 2-inch
Posca Paint Markers for mark making on top of your finished prints
Golden Fluid Acrylics Starter Set plus a couple of your choice: Teal, Orange, Green Gold, metallic gold, bronze, copper, iridescent pearl, interference
Scotch Heavy Duty Packing Tape to clean the dried paint from your plate before putting it away
Dish Basin filled with warm soapy water for keeping your tools clean as you work
Clear drawer System for storing collage papers